Web UI Quickstart: From Import to Exposition
Use the Web UI Quick Start to turn a public OpenAPI 3 contract into an MCP endpoint. Along the way, you will inspect the imported Service, configure its backend, and expose it through a running proxy.
Prerequisites
- Access to a reShapr
1.1.0Web UI and an account that can create Services, Configuration Plans, and Expositions - At least one running proxy registered as a Gateway in the Default Gateway Group
- Outbound access from the control plane to GitHub and from the proxy to
https://api.open-meteo.com
This tutorial uses the immutable Open-Meteo 1.5.6 OpenAPI 3 contract:
https://raw.githubusercontent.com/open-meteo/open-meteo/1.5.6/openapi/forecast.yml
Sign in and open Quick Start
Open your reShapr Web UI and sign in. From the dashboard, start Quick Start.
The wizard has four stages: Import, Artifacts, Plan, and Expose. Keep it open until the final stage; each stage uses the resources created by the preceding one.
Import the OpenAPI contract
On the Import stage:
- Select the remote URL import option.
- Enter the Open-Meteo contract URL shown above.
- Leave the Service name and version overrides empty. OpenAPI supplies both values through its
infoobject. - Start the import.
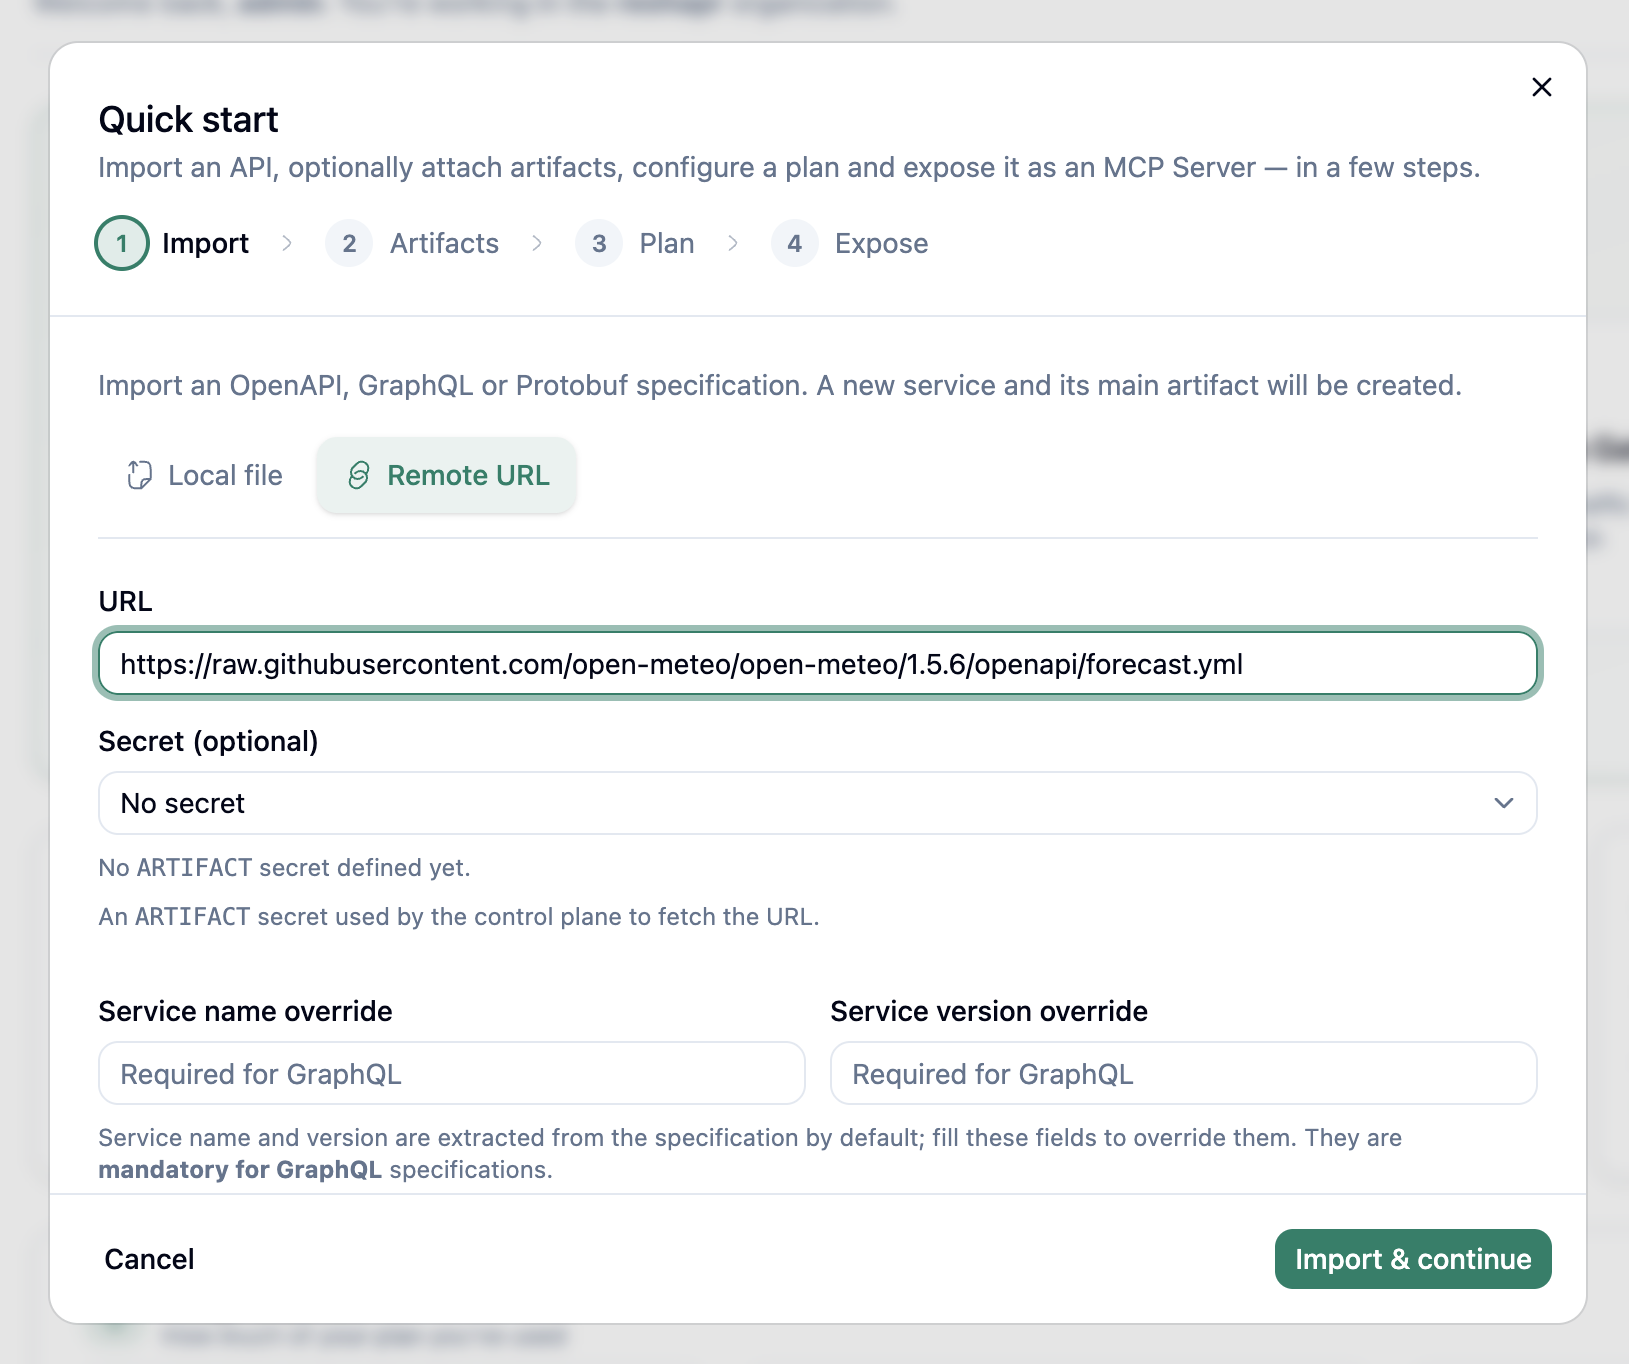
The result should identify a Service named Open-Meteo Weather Forecast API, version 1.0, with its OpenAPI contract as the main Artifact. The Service identifier shown by your environment is generated and will differ from other installations.
If the format is not recognized, confirm that you used the raw file URL and that the document declares OpenAPI 3.x. Swagger and OpenAPI 2.x documents are not supported in reShapr 1.1.0. See Import OpenAPI, GraphQL, or Protobuf Artifacts for format-specific troubleshooting.
Review optional Artifacts
Continue to Artifacts. This optional stage attaches reShapr-specific Prompts, Resources, Custom Tools, or output filters to the imported Service.
Do not add an Artifact for this tutorial. Continue to Plan with only the main OpenAPI Artifact. You can add and select complementary Artifacts later with Attach and Select reShapr Artifacts.
Configure the backend
On the Plan stage, enter this backend endpoint:
https://api.open-meteo.com
Keep all discovered operations included and continue. Quick Start creates a Configuration Plan named default, or updates that Plan if it already exists for this Service.
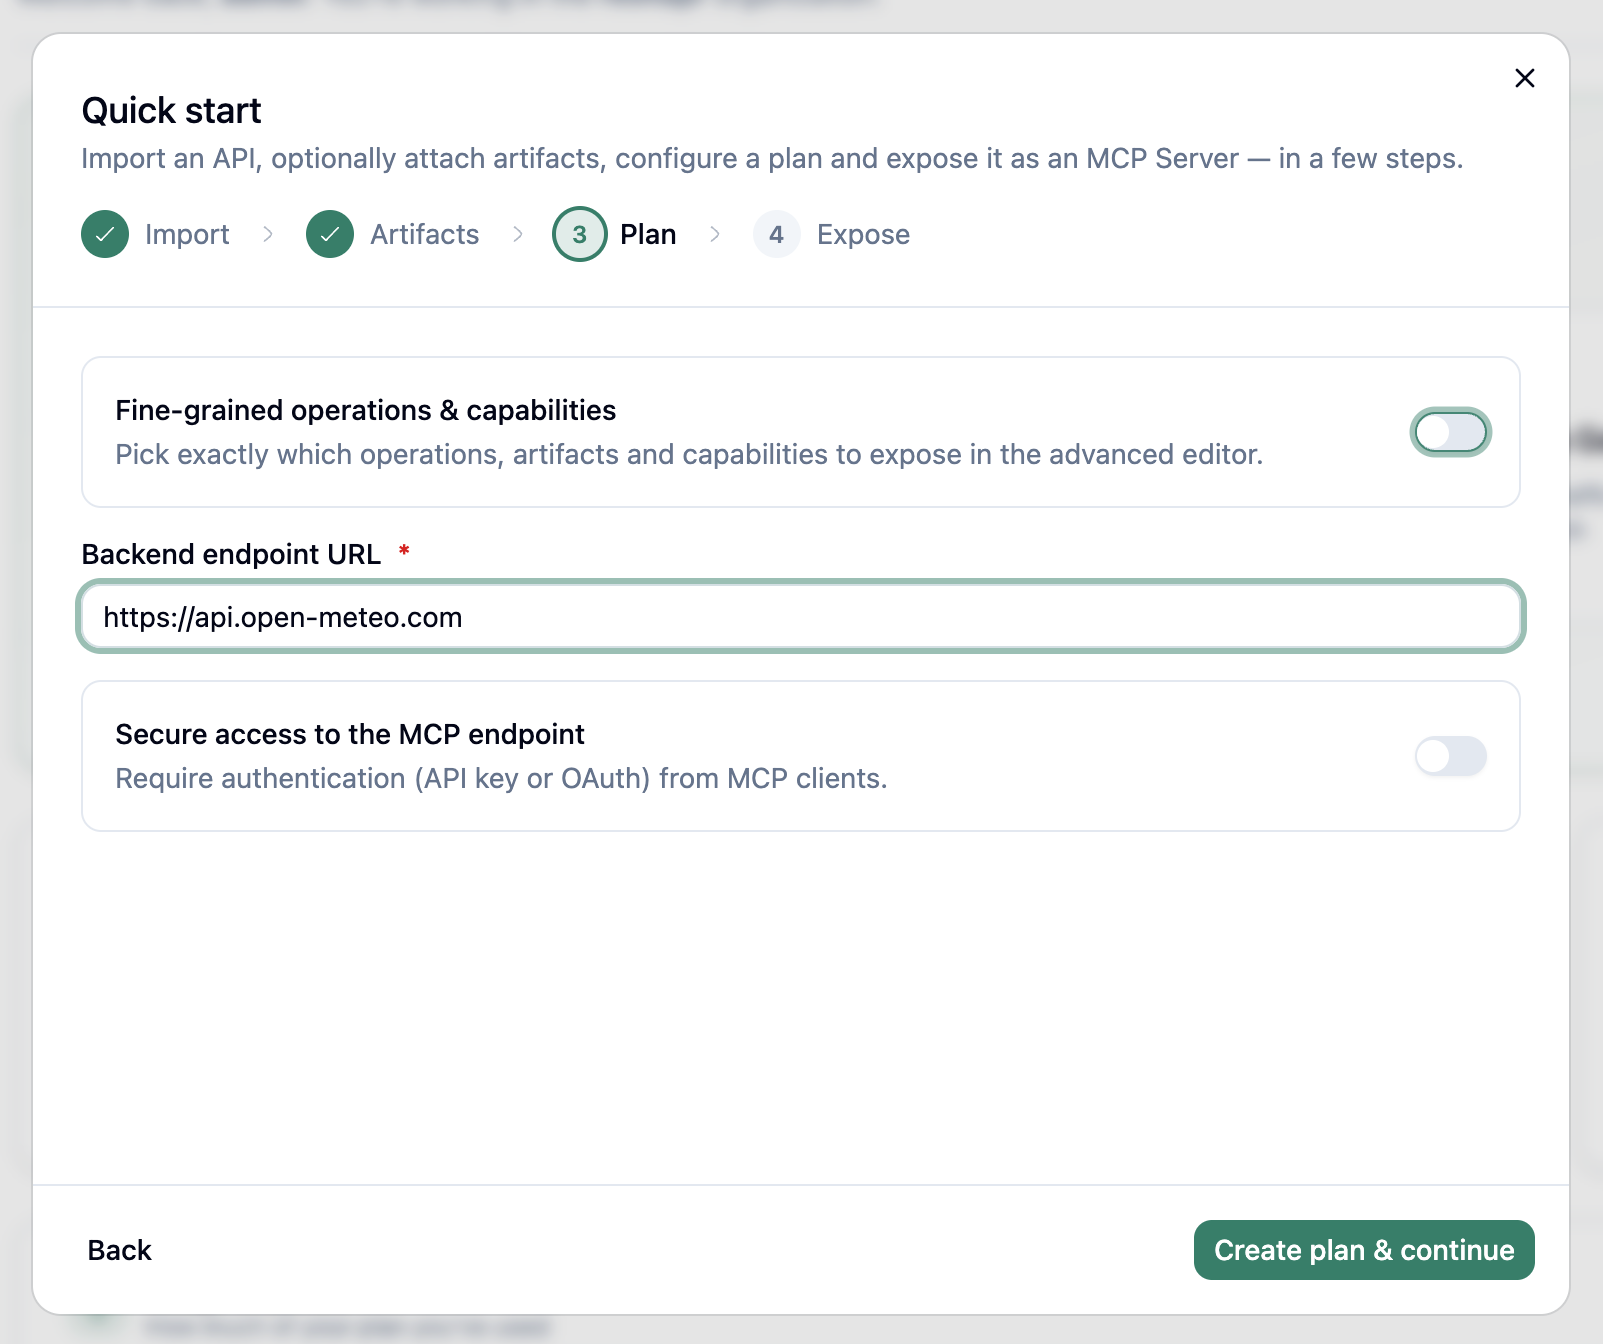
The backend endpoint is where the proxy sends generated Tool calls. It is distinct from the OpenAPI contract URL used during import.
For fine-grained operation or Artifact selection, use the advanced Plan editor instead of completing that configuration in Quick Start.
Create the Exposition
On the Expose stage:
- Choose to expose the Plan now.
- Leave endpoint security disabled for this first endpoint.
- Confirm the Exposition.
Quick Start targets Gateway Group ID 1, the Default Gateway Group. The completed view should show the created Exposition and one or more MCP endpoint URLs supplied by connected proxies through their Gateway registrations.
Endpoint URLs and resource identifiers are generated for your organization. A displayed URL can resemble this example:
https://mcp.example.com/mcp/acme/Open-Meteo+Weather+Forecast+API/1.0
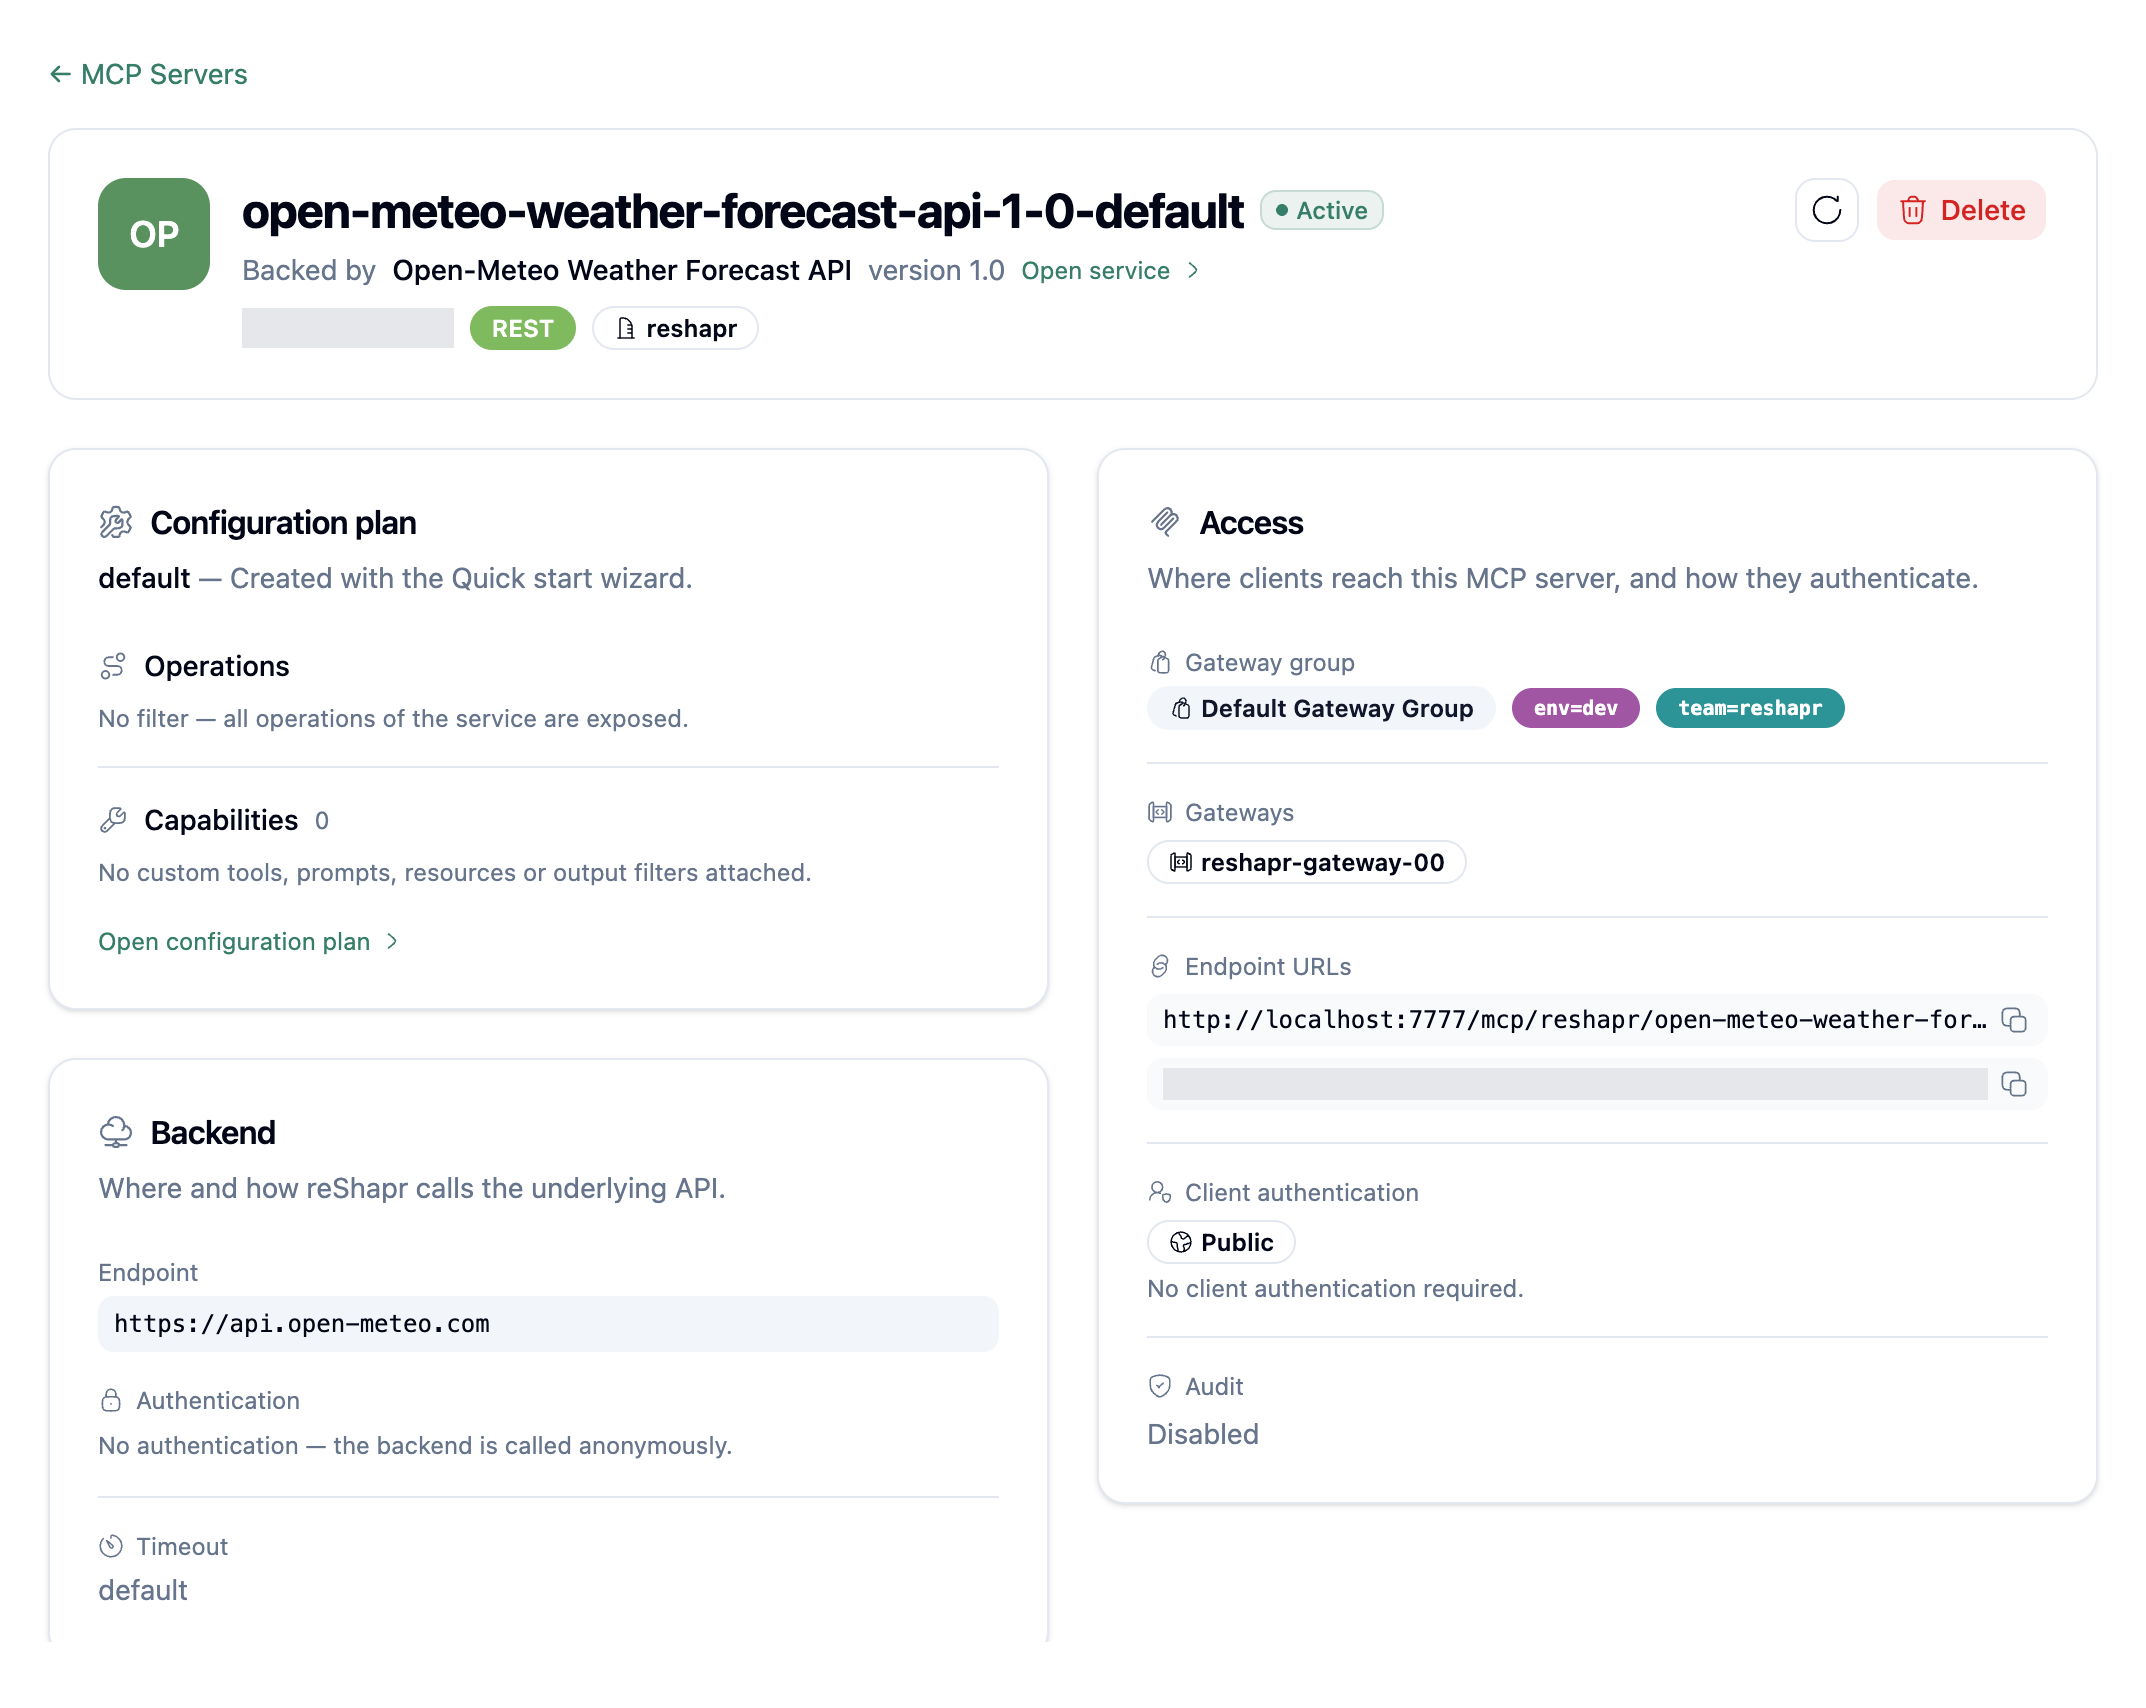
If no endpoint appears, verify that a proxy is running and registered as a Gateway in the Default Gateway Group. Creating an Exposition stores the intended deployment, but only a connected proxy can publish a usable endpoint.
If Quick Start reports that the Configuration Plan is already exposed on Gateway Group 1, open the existing MCP Server instead. A Plan can have only one Exposition per Gateway Group; Quick Start does not create a duplicate.
Quick Start can protect the endpoint with an API key or OAuth 2.0. An API key is displayed only when it is generated, so store it before leaving the completion view. Add security after this tutorial by following Protect an MCP Endpoint with an API Key or Protect an MCP Endpoint with OAuth 2.0.
Verify the result
Open the published MCP Server from the completion view or the dashboard's MCP Servers section. Confirm that it shows:
- Open-Meteo Weather Forecast API version
1.0; - the
defaultConfiguration Plan; - the Default Gateway Group;
- at least one MCP endpoint URL.
This confirms that the Web UI created the complete Service-to-Exposition resource chain. To verify MCP discovery and call the generated weather Tool, continue with Test an MCP Endpoint and use the exact endpoint URL displayed for the registered Gateway.
What you learned
You used the Web UI to import an OpenAPI 3 contract, inspect its Service, configure its backend through the default Plan, and publish an Exposition. The same resource model underlies CLI, API, and GitOps workflows.
Evidence and limits
This tutorial was replayed with the published reShapr 1.1.0 Web UI on 2026-10-20. Optional endpoint security was not replayed. Its workflow follows the release-tagged Quick Start wizard and Artifact import form.
Quick Start uses the default Plan and Default Gateway Group rather than asking you to choose names or a target group. Use the full Plan and Exposition views when you need several Plans, another Gateway Group, or more control over the exposed MCP surface.